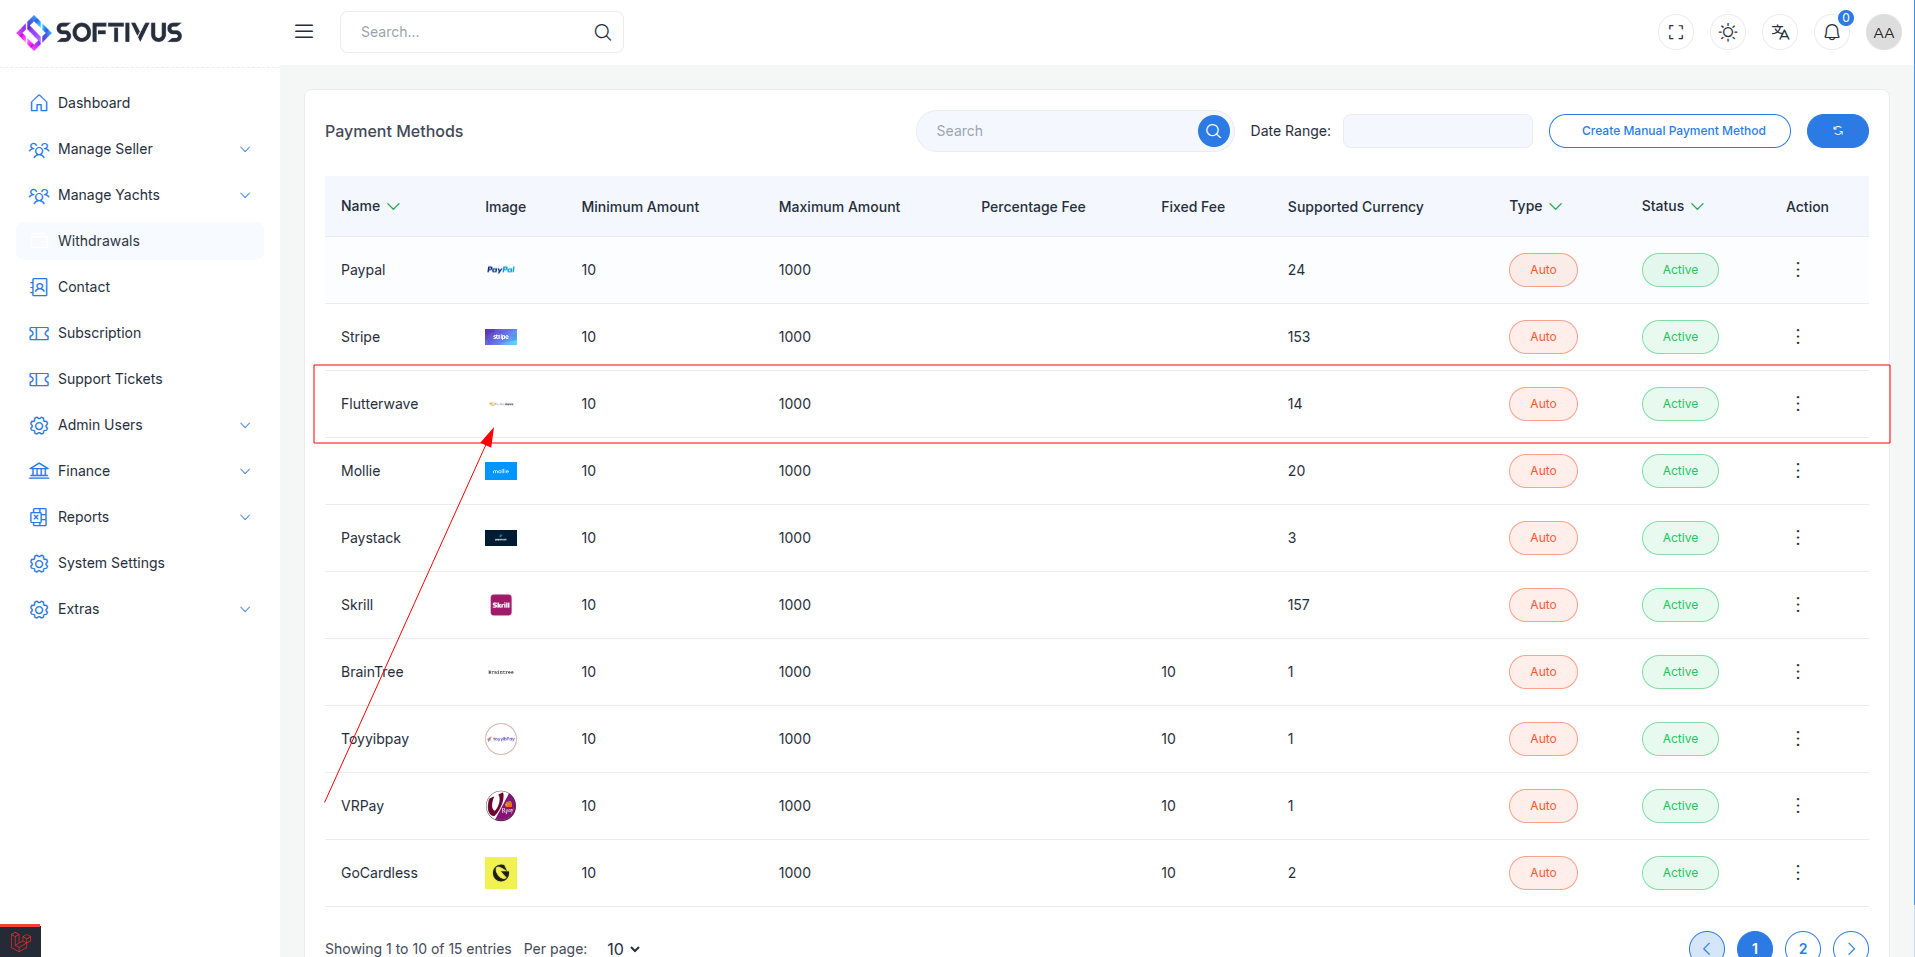
Flutterwave Payment
Flutterwave is a payment gateway that enables businesses to accept payments from customers across Africa and beyond, supporting multiple payment methods like cards, mobile money, and bank transfers.
Step 1: Log in or Sign Up
- Go to Flutterwave Dashboard and sign up or log in to your Flutterwave account.
- Once logged in, you’ll be redirected to the Flutterwave Dashboard.
Step 2: Create an Application
- On the Flutterwave Dashboard, navigate to Settings > API Keys & Webhooks.
- You don’t need to explicitly "create an app" like some gateways; Flutterwave provides API keys directly tied to your account.
- Ensure your account is set up for either Test Mode (for development) or Live Mode (for production).
Step 3: API Credentials
After setting up your account, Flutterwave will provide the following:
- Public Key: Used to initialize payments.
- Secret Key: Used for secure API calls.
- Encryption Key: Used for payload encryption in some integrations.
- Test & Live Modes: Start in Test Mode for testing, then switch to Live Mode for real transactions.
To get your credentials:
- In the Flutterwave Dashboard, go to Settings > API Keys & Webhooks.
- Copy the Public Key, Secret Key, and Encryption Key displayed there.
All the credentials can be added to your application Admin Panel under System Settings > Payment Gateways > Flutterwave.
Step 4: Set Up Webhooks
- In the Flutterwave Dashboard, go to Settings > API Keys & Webhooks.
- Scroll to the Webhooks section and click Add Webhook.
- Enter your Webhook URL. This is the URL on your server where Flutterwave will send event notifications (e.g.,
https://yourwebsite.com/webhooks/flutterwave). You can find this in your admin panel. - Select the events you want to receive notifications for (e.g.,
charge.completed,transfer.completed). - Click Save to confirm the webhook.
Flutterwave will use this webhook to notify your application of payment statuses.
Step 5: Set Up Credentials in Our Dashboard
- Go to your admin dashboard and navigate to the "Payment Gateways" section under System Settings > Payment Gateways > Flutterwave.
- Enter your Flutterwave API keys in the form provided. Follow the instructions to set up the payment gateway.
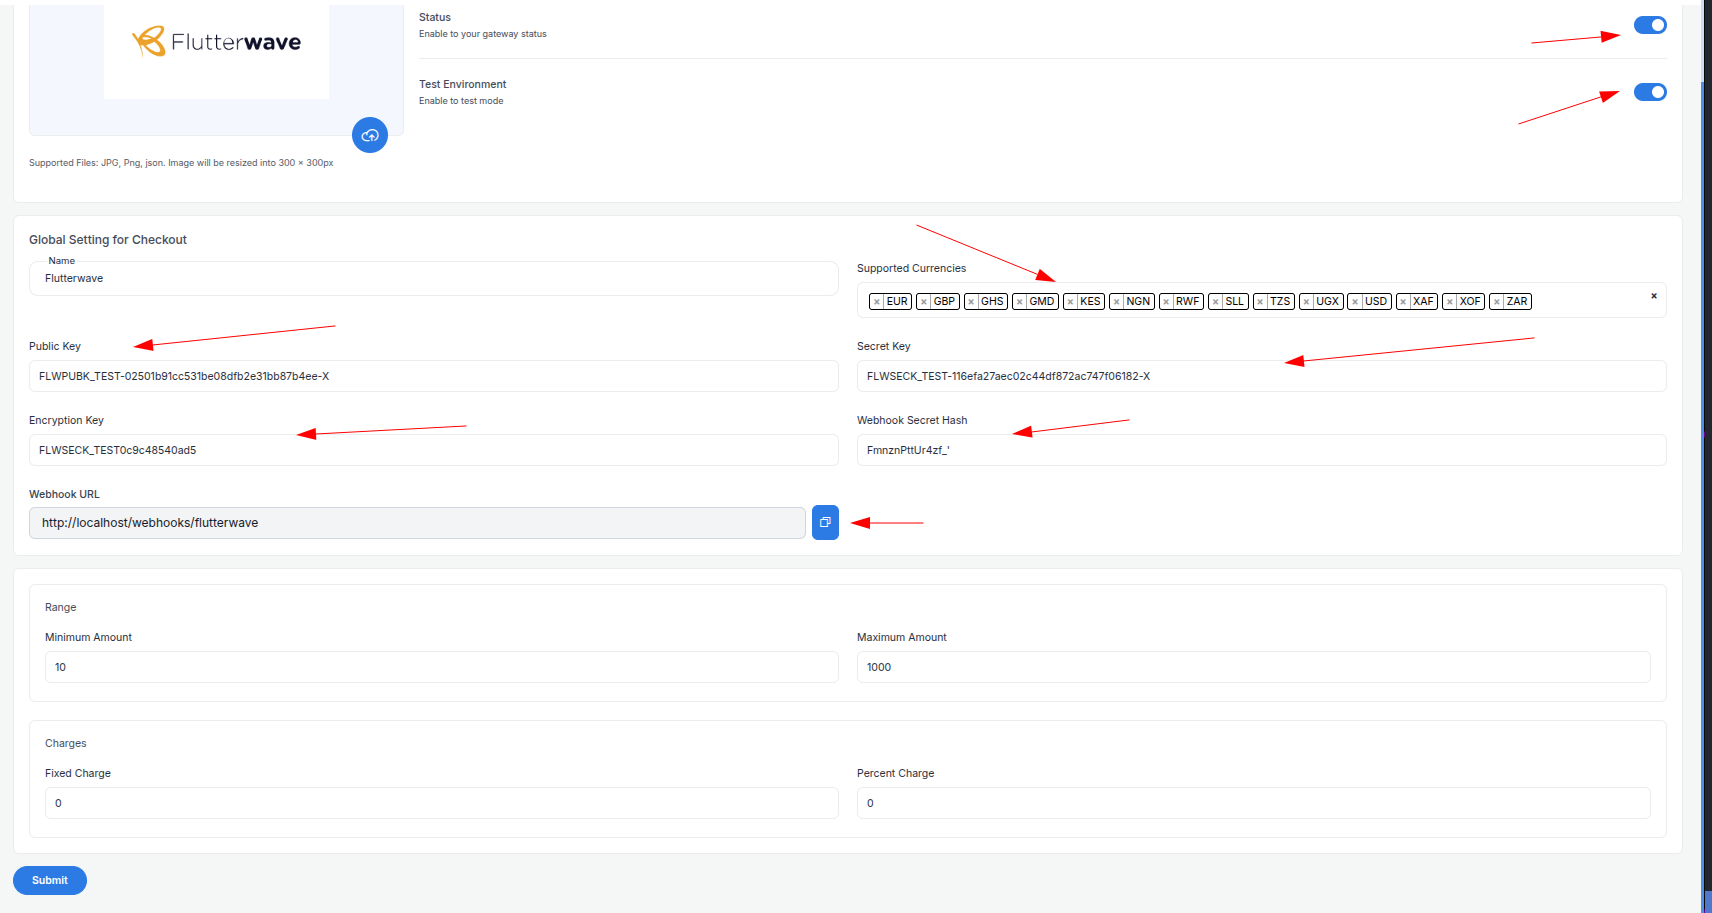
- Configure the required fields:
- Supported Currencies: Select the currencies you want to accept payments in (e.g., NGN, USD, GHS).
- Active: Turn on the payment gateway to accept payments.
- Live Mode: Enable live mode to process real transactions.
- Public Key: Enter your Flutterwave public key.
- Secret Key: Enter your Flutterwave secret key.
- Encryption Key: Enter your Flutterwave encryption key (if required).
- Webhook URL: Copy the webhook URL from here and paste it into the Flutterwave Dashboard’s webhook section.
- Minimum Amount: Set the minimum payment amount.
- Maximum Amount: Set the maximum payment amount.
- Fixed Charge: Set the fixed charge for payments.
- Percentage Charge: Set the percentage charge for payments.
Then click the "Submit" button, and your payment gateway will be ready to accept payments.
Step 6: Test the Integration
- While in Test Mode, use the test API keys provided by Flutterwave (available in Settings > API Keys & Webhooks).
- Test various payment flows (e.g., successful payments, failed payments) using Flutterwave’s test cards or payment methods.
- Verify webhook notifications are received correctly on your server.
Step 7: Enable Live Mode
- After successful testing, switch to Live Mode in the Flutterwave Dashboard by using your live API keys.
- Update your application with the Live Public Key, Live Secret Key, and Live Encryption Key.
Step 8: Go Live
- After enabling live mode, you can start accepting real payments from your users.
- Verify that you’re using the correct Live API credentials in your app.
- Make real transactions to ensure the system works smoothly in production.
Note:
If you have any questions or need further assistance, please don’t hesitate to contact our support team. We’re here to help you every step of the way.